What Do I Need To Start A Pressure Washing Business
Introduction
Starting a pressure washing business can be a rewarding venture. But, it’s important to have the right tools, a solid plan, and a clear understanding of the services you want to offer.
Here’s a breakdown of everything I’ve purchased so far, from choosing my logo all the way to having my van set up, ready to service customers. This guide is specifically based on how I have personally started my own pressure washing business and focuses on equipment used for driveway and patio cleaning, so I won’t cover items used for roof cleaning and other services outside of pressure washing flat surfaces. These will be added later down the road.
For now, this guide should point you in the right direction if you are thinking about starting your own pressure washing business.
Essential First Steps for Setting Up Your Pressure Washing Business

Step 1: Business Name
Choosing a business name is something I spent far too much time on, and I’m still not 100% sure if I made the right choice. When it comes to choosing your business name, the best advice I heard was to avoid limiting yourself to a particular service by using a name that only represents one service. Instead, choose a name that can be easily adapted to a variety of services. This approach gives you more flexibility and room to grow.
Step 2: Logo Design
Like the business name, my logo was something else I probably spent too much time on initially until I found a website called Looka. With Looka, it took me a couple of hours to come up with something that I was happy with.
Looka does allow for the purchase of the logo on its own, which is reasonable, but I actually went for the brand kit which gave me access to a whole host of tools to help me get started with setting up the business. This is something I opted for as I wanted all the help I could get when it comes to setting up the online side of things. I designed my first flyers and business cards using the Looka brand kit, so it might be worth looking into.
It’s taken some of the stress out of the process for sure. The Logo Brand Kit cost me £77.08 per year, but as mentioned prior, you can always just opt for the logo-only option, which is a one-time payment of around £15 for the basic logo package.
Step 3: Domain Provider
Having a domain is essential for any business. This will be used to set up your website and social pages and link them all together. Regardless of whether you are an online business, a service-based business, or both, you will definitely want to have this set up sooner rather than later. Having the website set up sooner will allow for your website to be recognized by Google and start the aging process, helping your domain rating, etc.
Step 4: Business Email Account
I used GoDaddy for my domain along with a Microsoft 365 add-on, which means I now have a business email account @msrcleantech.com. This will separate everything business from your personal emails. Having a proper business email means you look more professional from the get-go and also helps in terms of organization.
My domain and Microsoft 365 add-on came to £49.03. The prices will vary depending on the domain that you choose and whether or not you add anything on. A domain will be needed though, so shop around if needs be.
Step 5: Social Media
Just like the website, having your social media set up early will never be a bad idea. Now, I understand that when you first start up, just like me, you have no pictures or content to use on these platforms such as Facebook, Instagram, and Twitter.
You might as well set them up with all of the relevant info like the page bio and cover photos, preferably using your new logo for now. Doing this means once you have serviced a few customers and have some content to follow, at least your accounts are all there ready to post your content.
Step 6: Sole Trader or Limited Company Setup
When registering your business, you have two options. You can either set up as a sole trader, which I cannot speak on too much as I’ve never been a sole trader, or you can set up as a limited company. This I can speak on somewhat, as I have another telecoms business set up as a limited company, along with my pressure washing business.
I’m not 100% sure whether you need to be registered straight away to start work, as I am under the belief that you can earn a certain amount before it becomes a mandatory requirement to register.
I have personally gone LTD with MSR CLEANTECH because that’s my preference, but be sure to do your research on the two before you commit to which one you would like to choose. I’m based in the UK, so I used the https://www.gov.uk/ website to set mine up.
Step 7: Insurance
Insurance is a must-have regardless of whether you are set up as a business or not; you will definitely want insurance. Obviously, this will cover such things as property damage and public liability, which are the main things you would want to be covered for. Fortunately, I have just purchased my insurance with a company called Howden Insurance.
Call these guys and ask for someone called Jack Bowley. He came highly recommended via a course I attended, which I will get into on later posts or leave a comment and I will let you know all about it.
I purchased my insurance through Jack at Howdens, and I’m very happy with the price. It’s nearly half the price of the insurance for my telecoms business, so you can imagine I was very happy with the quote. It covered everything I needed, and it was a super easy process.
Jack deals with people in the exterior cleaning business all the time, so he knows exactly which cover is needed and which company he needs to create the cover with. Like I said, super easy and affordable pricing.
Step 8: Low-Tier Waste Carrier’s License
The low-tier waste carrier’s license in the UK is for small businesses or individuals who transport waste as part of their work, like gardeners, small-scale builders, or house clearance services. It’s a legal requirement to ensure waste is handled responsibly and safely, protecting the environment and building trust with clients.
Getting the license is straightforward and free if you qualify, and you can apply online through the Environment Agency’s website. It helps show that your business is professional and compliant with waste disposal regulations.
Essential Gear for Kick-Starting Your Pressure Washing Business
You’re going to find out about the core items you need to get your pressure washing business off the ground. The list isn’t just about having a powerful pressure washer; it’s also about rounding up all the extras that are critical to handle every job with professionalism and safety. Please be aware that I have bought everything from new as I’m fortunately in a position to do so.
This does not mean that you need to follow in my footsteps. You can probably find some great second-hand deals out there if you dig deep enough, and obviously, it will all depend on your personal budget. The whole point of this is to give you an idea of what kit is needed to get started without having to guess too much, which I hope becomes helpful for you.
Again, if you feel that anything is missing, then please let me know. I may have gone overboard a little, I don’t know, as I am told that many people start up with less. So, please don’t get overwhelmed or put off by this list.
Main Equipment
Pressure Washer
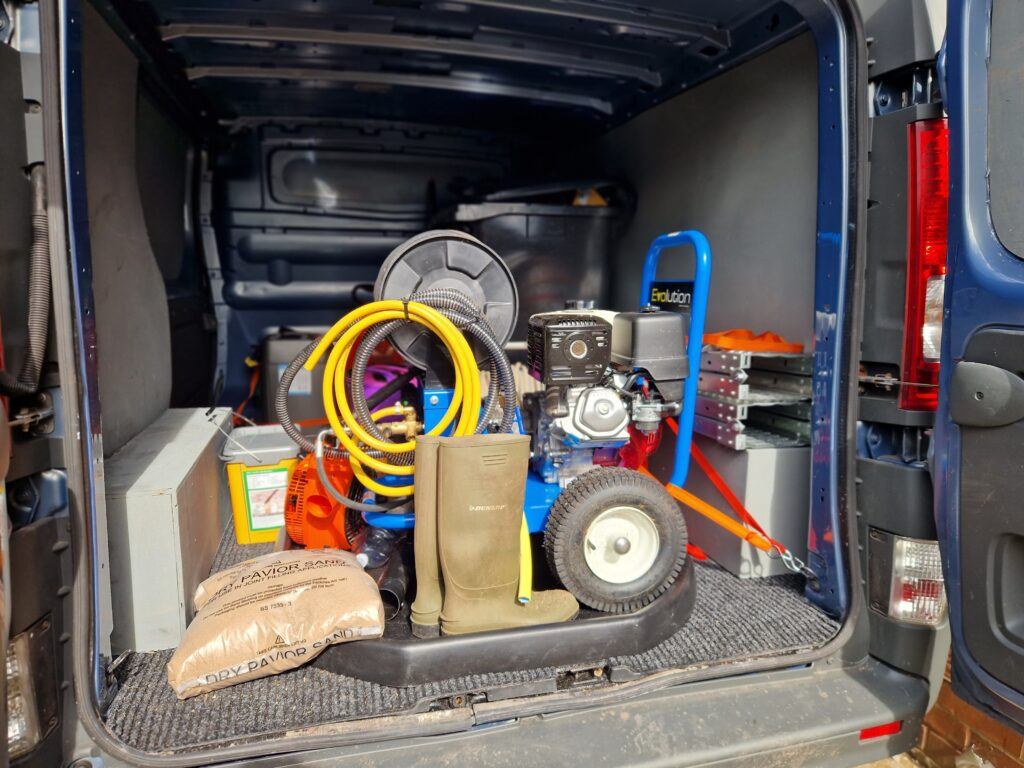
A pressure washer will obviously be the main and most expensive piece of equipment if you exclude the vehicle that you use to transport all of your kit. I am no expert when it comes to pressure washers, but I decided on a Honda GX390 – 21Lpm (Litres per minute) machine built by Dual Pumps and bought from Pumps & Pressure. This machine was bought brand new as I wanted the warranty etc, that comes with it.
I opted for a 21 LPM because it was recommended to me over a 15 LPM machine by people that I met on a course. Their reasoning was down to the fact that a 21lpm machine makes it easier to wash down after you have cleaned the surface, which now after using my machine I can see their point.
If I could give you any decent advice for choosing a jet wash, it would be this: choose a pressure washer with a Honda engine, as these are industry standard along with being reliable and easy to service and order parts for them if needed.
High Pressure Hose
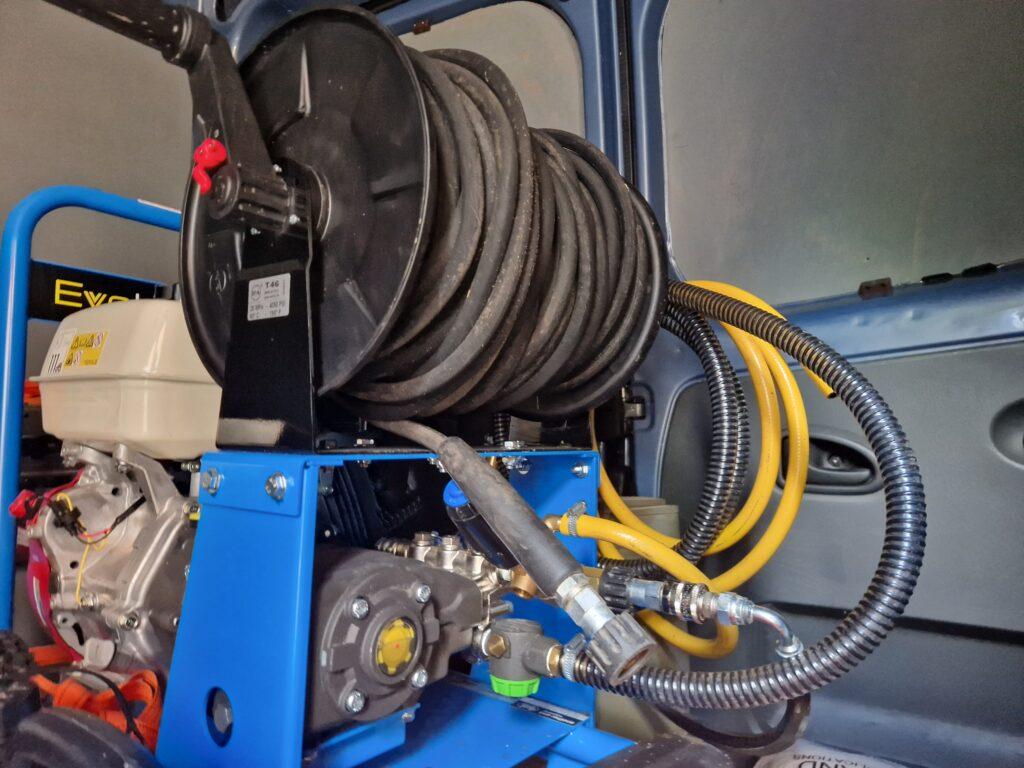
Generally, most pressure washers will come with a 10m high-pressure hose, which should be fine for most jobs, especially in the beginning. I opted for the particular model of PW above mainly because it came with a 40m hose on a reel fitted to it, so this was really convenient and will come in handy in the future on bigger jobs.
On the plus side, having a longer hose means you can leave the PW in the van on most jobs, saving you the task of loading and unloading a heavy machine for each job.
Lance/Turbo Nozzle
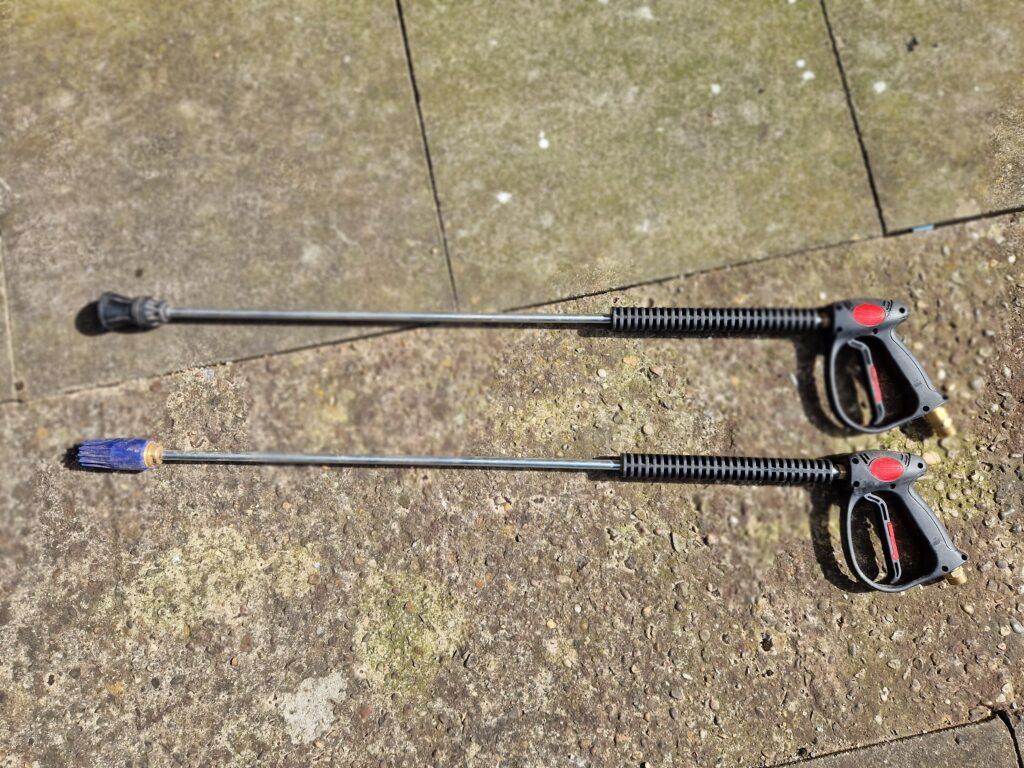
To get started, you will need lances. I have two lances, one standard lance and a turbo lance. The standard lance came with the PW also, but I had to buy the turbo lance separately.
Most of the pressure washing packages I have seen always come with a standard lance and hose, but if you buy a second-hand machine, there is a chance that it does not come with either, so you will need to buy them if this is the case.
Whirlaway/Surface Cleaner
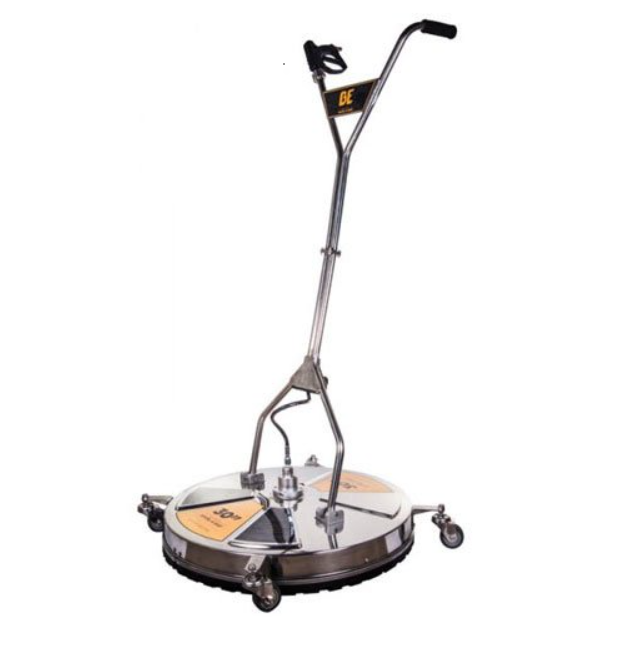
I have not yet bought one of these as I’ve spent enough at the minute and have enough kit to get going, but I will be purchasing it in the near future. Having one of these will be mandatory for large surface areas where lances just do not cut it. Again, these can be part of a bundle package with some PWs, so keep an eye out for those deals that include them.
Suction Hose
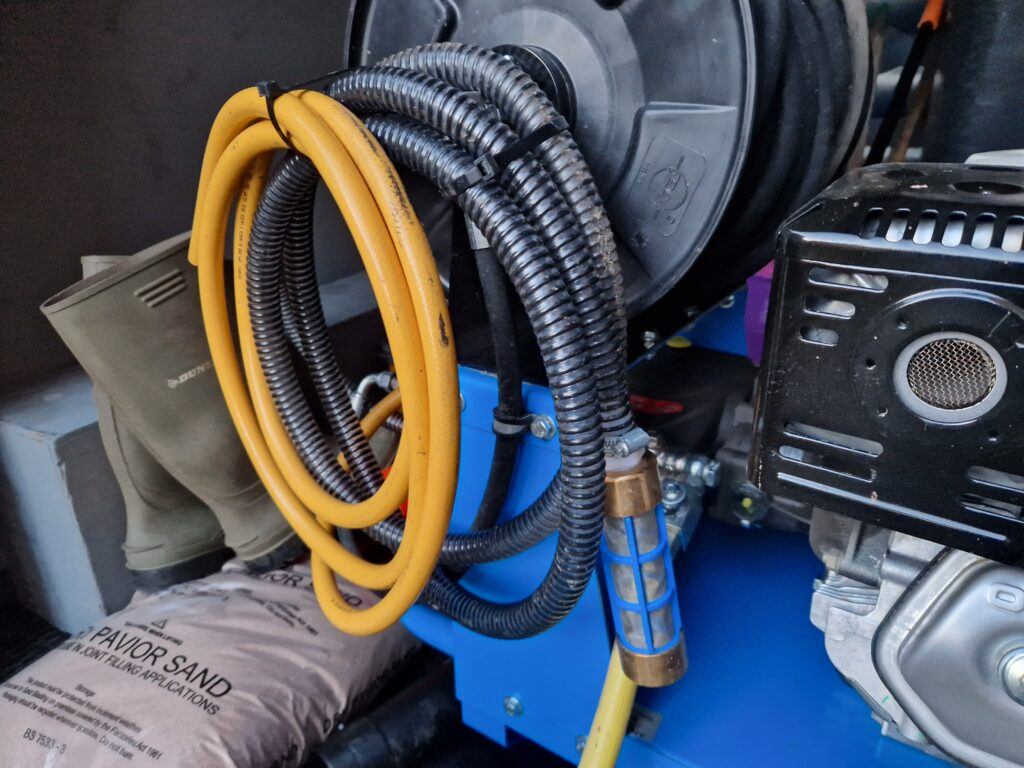
A suction hose is usually a ribbed pipe that connects to your pump that drags water from the buffer tank. Mine sits directly in the tank that I have with a filter on the end of it, but some people set their buffer tank up so that it connects directly to the bottom of the tank.
This method is ideal if you have a van-mounted machine and tank. A suction hose should be included when purchasing a PW, but always check as you will need one.
Buffer Tank
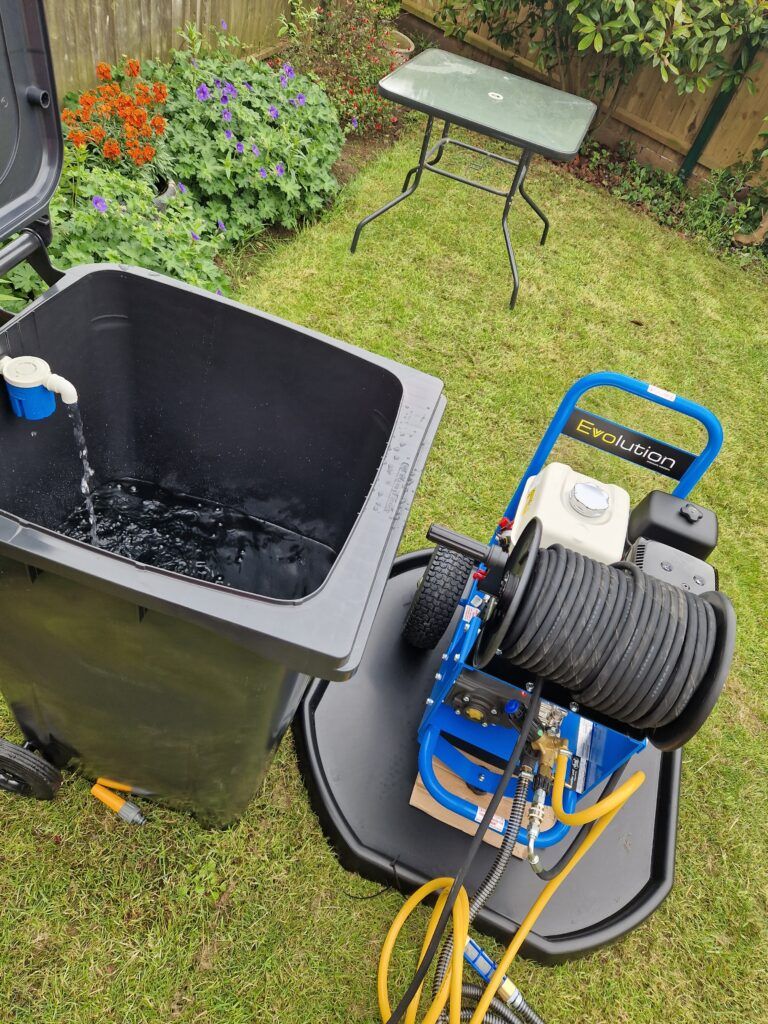
Buffer tanks are a must-have if you are running a machine that is 15 LPM or more. In reality, most people’s outside tap pressure never really surpasses the 12 LPM mark so I would just get one regardless to avoid any outside tap water pressure issues. I have done my research, and it would seem that most people agree on this, especially the ones that have been in the game for a while.
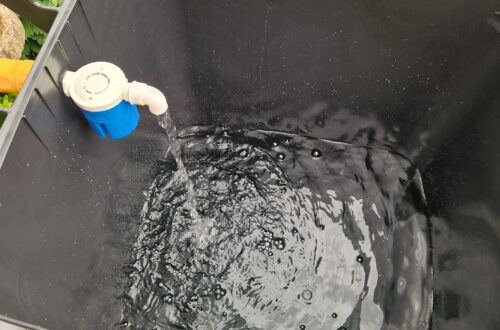
There is no need to overthink it when it comes to buffer tanks. I use a 240L wheelie bin with a float valve fitted to it, and that’s it.
Simply submerge your suction hose from your PW into the water, and you are ready to go. My machine is a 21 LPM machine, and the water supply from the buffer tank lasts a good while before I have to wait for it to refill.
Plus, whilst you are using water, the water level is being mitigated by the outside tap, so in essence, you actually get more water usage than 240L, if that makes sense because it will be filling up whilst you are draining water from it simultaneously.
Secondary Equipment
To make things easier, I have created a laundry list below. You might not need to buy everything on this list, as some of it you may already have, but for me, I was starting with nothing, so I went all in.
Tools & Essentials
- Cement mixing spot (for placing the PW on and preventing oil spills, etc.)
- Spill socks (to catch any large debris and keep water from entering under garage doors, etc.)
- Moisture meter Brennanstaul (checking moisture levels before sealing)
- Flow meter (to check the water pressure when quoting jobs)
- Brushes (for cleaning debris/excess water and re-sanding)
- Tarpaulins (for covering areas when using certain chemicals)
- 10L Gerry can (to carry fuel for the PW and leaf blower)
- Bungee straps (to hold light items in place in the back of the van)
- Ratchet straps (to hold heavy items in place in the back of the van)
- Van ramps (for easy loading and unloading of the PW)
- Garden waste bags (for removing any leftover debris from the site)
- Soft builders buckets (mixing chemicals, etc.)
- HDPE jugs/containers (for measuring and mixing chemicals)
- Tape measure/measuring wheel (for quote jobs using meters squared)
- PTFE tape (used for water tightening on hose joints, etc.)
- Automatic float valve (used on the buffer tank to stop overflow)
- Nuts and washers for float valve
- Wheelie bin 240L (used as the buffer tank, optional)
- Watering can (applying cleaning chemicals)
- Window cleaning kit (cleaning your customers’ windows after jet washing, as no doubt they will get dirty)
- Sylstar 8L sprayer (used for spraying light chemical or weed killer)
- Garden hose (I opted for a 50m hose, which should cover most driveway distances from my van to the outside water supply)
- Chapin 1949 sprayer (this is a highly recommended industrial sprayer for chemicals and sealants)
- Leaf blower (I use this for blowing the remaining sand off the top of the brick when you are re-sanding block paving. It’s very handy to have)
- Tool Box (have a small tool box made up to keep up on equipment maintentance on site if needed).
Safety & PPE
- Safety signs or wet floor signs (for clear visibility of the work area and covering trip hazards).
- Safety gloves (nitrile gloves when using chemicals).
- Wellies (it’s a wet and messy task, so these are needed for obvious reasons).
- Waterproof clothing.
- ABEK P3 masks (an ABEK P3 mask must be worn when dealing with chemicals, etc.).
- Saftey Goggles
- Ear Muffs
Transportation For Your Pressure Washing Business
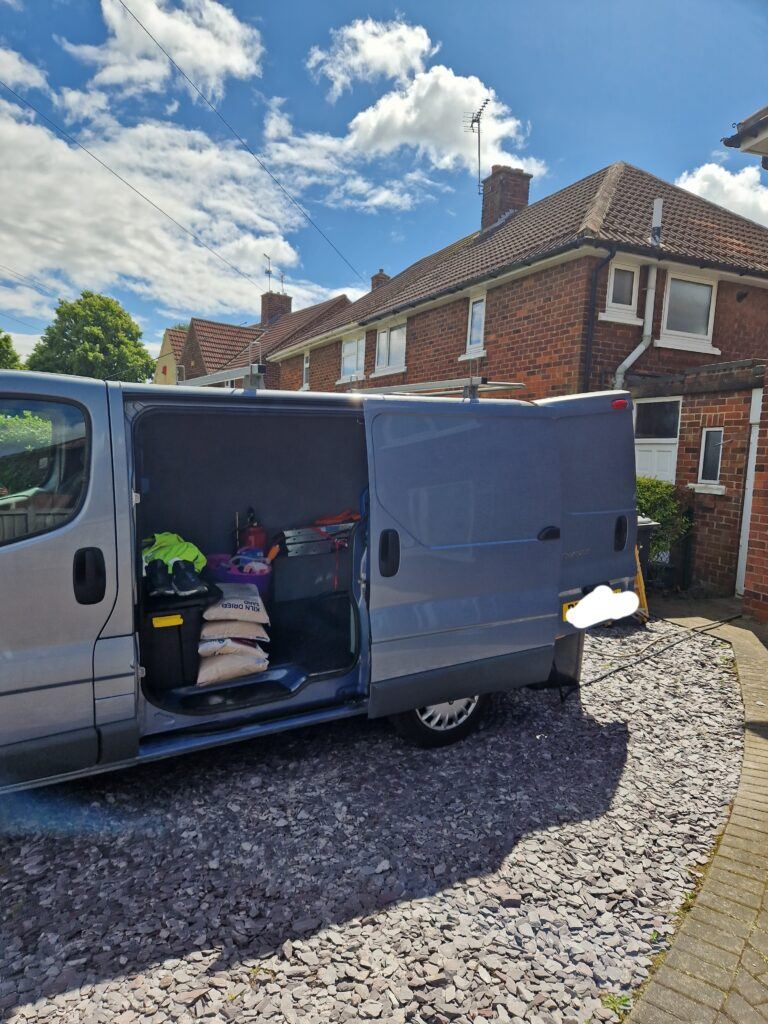
Now, a solid vehicle is more than just a means to carry your gear; it’s the backbone of your mobile operation. Choose something that fits your business needs. For most, a spacious van is going to include enough room for all the bulky items like the pressure washer, hoses, tanks, and don’t forget the detergents/chemicals and safety gear.
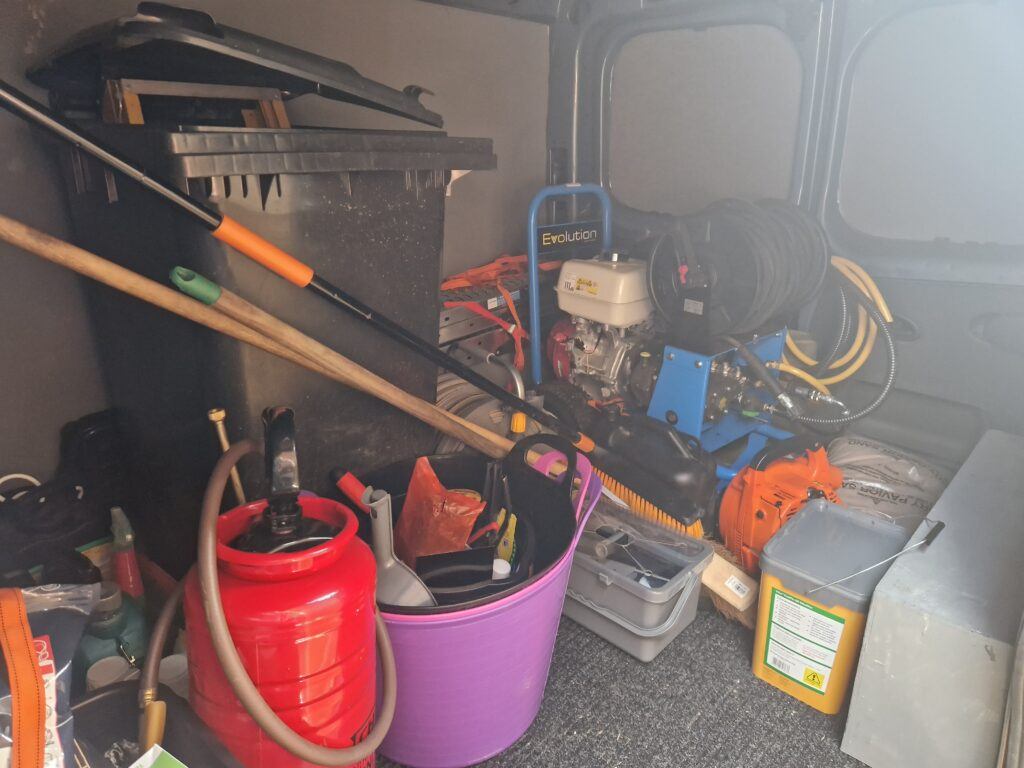
My choice was a second-hand van, and it has been serving me incredibly well. I went for a Renault Trafic van, which isn’t classed as a small van, but somewhere in the middle. I can comfortably fit all the gear listed above in it with plenty of extra room for when I undoubtedly buy more items to provide more services later on.
Smaller Vans
I know that some guys start off with small vans, but for me, I would rather have more space and not need it than need more space and not have it. Realistically, it’s not like a Renault Trafic takes up that much more space on your driveway than a Citroen Berlingo, so in my opinion, it makes sense to get a reasonable sized van.
Don’t worry too much about going for the brand-new models. A well-maintained used vehicle can be just as reliable and a ton more cost-effective. However, what you can’t skimp on is regular maintenance. A breakdown not only costs you repairs but could also mean missed jobs and a blow to your reputation.
Keeping it Organised
In my opinion, organizing your equipment smartly can save you time and hassle at job sites. Keep everything in place, which makes loading and unloading a breeze. And guess what? Those few minutes saved add up, allowing me to take on more work or even squeeze in that much-needed coffee break. The takeaway? Invest in transportation that’s reliable and suits your scope of work. And whatever you do, make sure you organize your equipment effectively.
martin@msrcleantech.com
Exterior Cleaning, England, South Yorkshire UK


