Safe And Secure: How To Use Extension Ladders With The Right Accessories
Ladder Safety Tips for Gutter Cleaning: Stay Safe While Protecting Your Home
Ladder safety should always be the top priority. While using a ladder might seem like a straightforward task, it comes with its fair share of risks if not done correctly. Even a momentary lapse in concentration or inadequate preparation can lead to accidents—most of which are entirely avoidable.
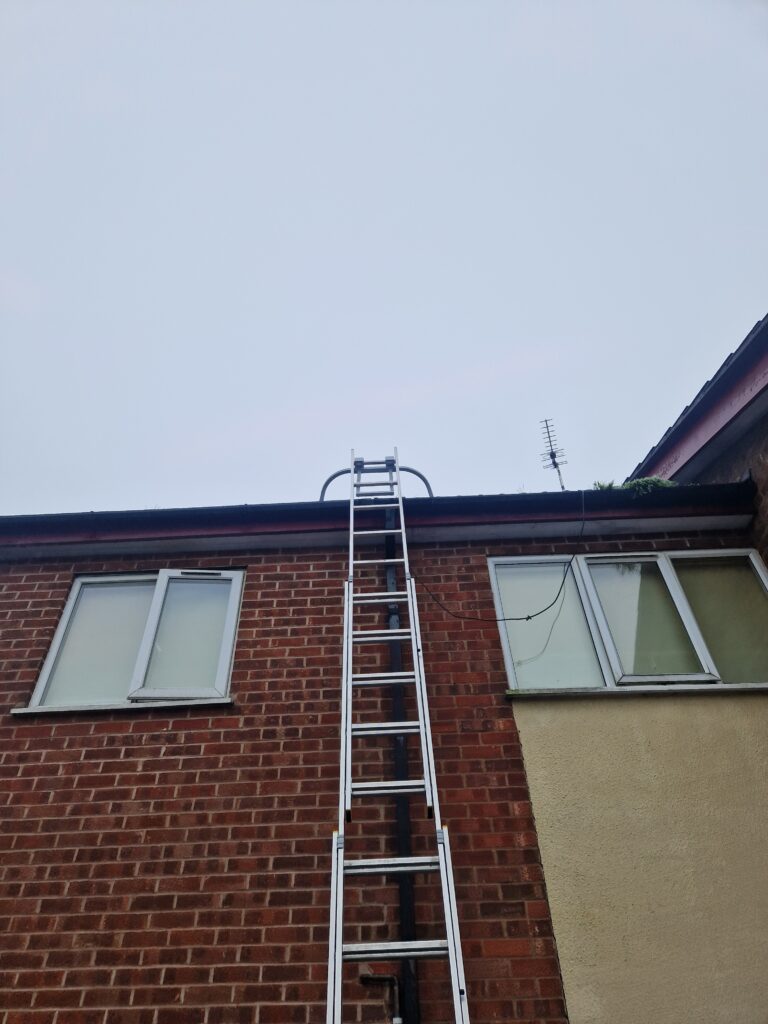
My background in cellular telecommunications required me to climb large steel towers daily, often working at significant heights. On those fixed structures, safety was always ensured with equipment like harnesses, lanyards, and work positioning belts. While this setup works well for fixed structures, it doesn’t translate to the use of unfixed ladders for tasks such as gutter cleaning. Without the stability of a fixed anchor point, the risks are considerably higher.
In this article, we’ll look at why ladder safety is so crucial for gutter cleaning and explore the essential accessories I’ve invested in to make ladder use as safe as possible. If, like me, you feel uneasy about using unfixed ladders for specific tasks, the tools and tips listed here will definitely help secure your ladder and make the job safer and more manageable.
Why Ladder Safety is Crucial for Gutter Cleaning

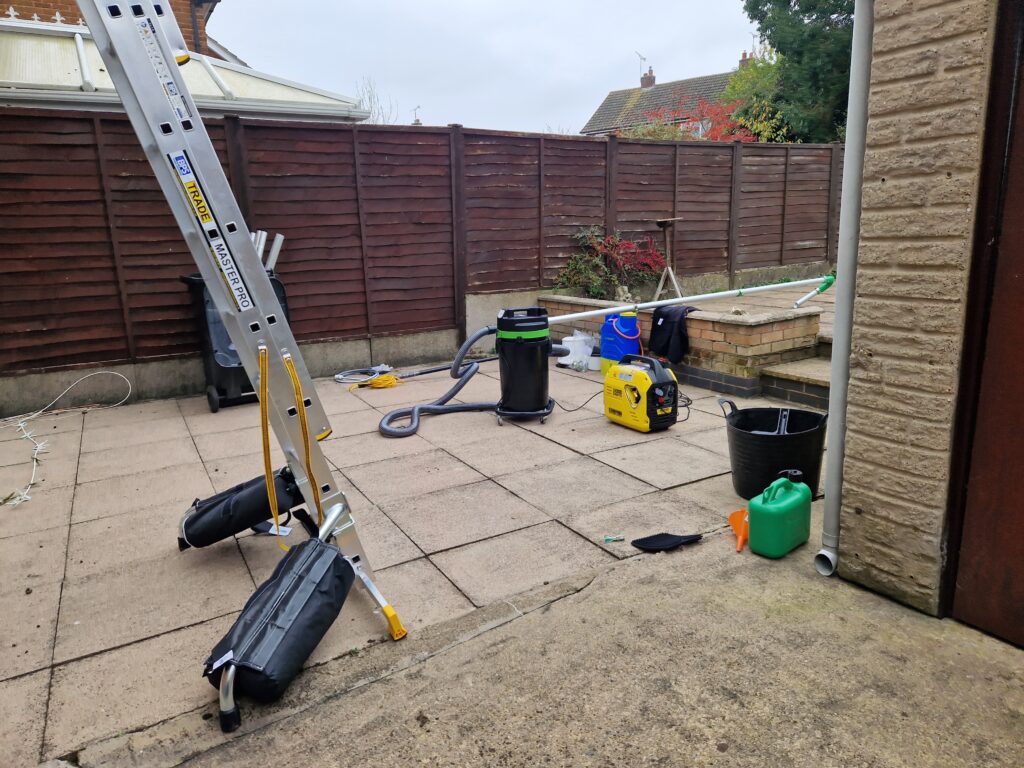
Cleaning gutters often involves working at significant heights, which can pose serious risks. While the use of gutter vacuums can help mitigate some of the dangers, there are times when ladders are unavoidable, such as fixing a gutter downpipe, or those solid blockages that require a by-hand approach.
The risks shouldn’t be underestimated even if it’s just a couple of meters off the ground. I’ve heard enough horror stories to make ladder safety a top priority, prompting me to invest in safety accessories right away, before I ever used them once.
Unfortunately, handling tools and navigating uneven or slippery surfaces are hazards we face when using unfixed ladders. These conditions can escalate quickly without the right precautions. According to the UK Health and Safety Executive (HSE), ladder-related accidents are one of the leading causes of workplace injuries, with many incidents also occurring at home during DIY tasks. Falls from ladders can lead to serious injuries—or worse—highlighting the need to treat ladder safety with the respect it deserves.
By prioritising safety measures, you’re not just protecting yourself from potential harm but also ensuring the job is done effectively. Proper precautions save time, reduce unnecessary risks, and provide peace of mind. Whether you’re a professional or tackling DIY tasks, respecting ladder safety is non-negotiable for both your wellbeing and the quality of the work.
Essential Ladder Safety Accessories
Here some of the ladder saftey accessories I have personally purchased. I would love to know in the comments if you have anymore saftey accessories that you use. Investing in the right safety can significantly reduce the risks associated with ladder use. Here are five accessories I rely on in my gutter cleaning service:
1. Ladder Standoffs
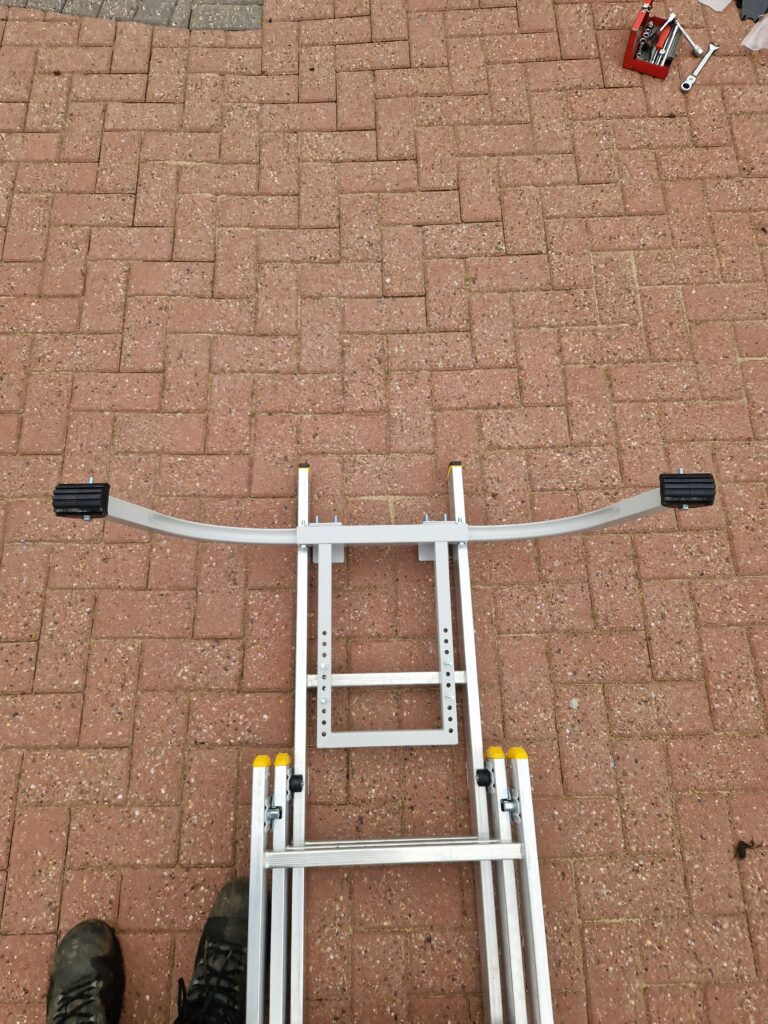
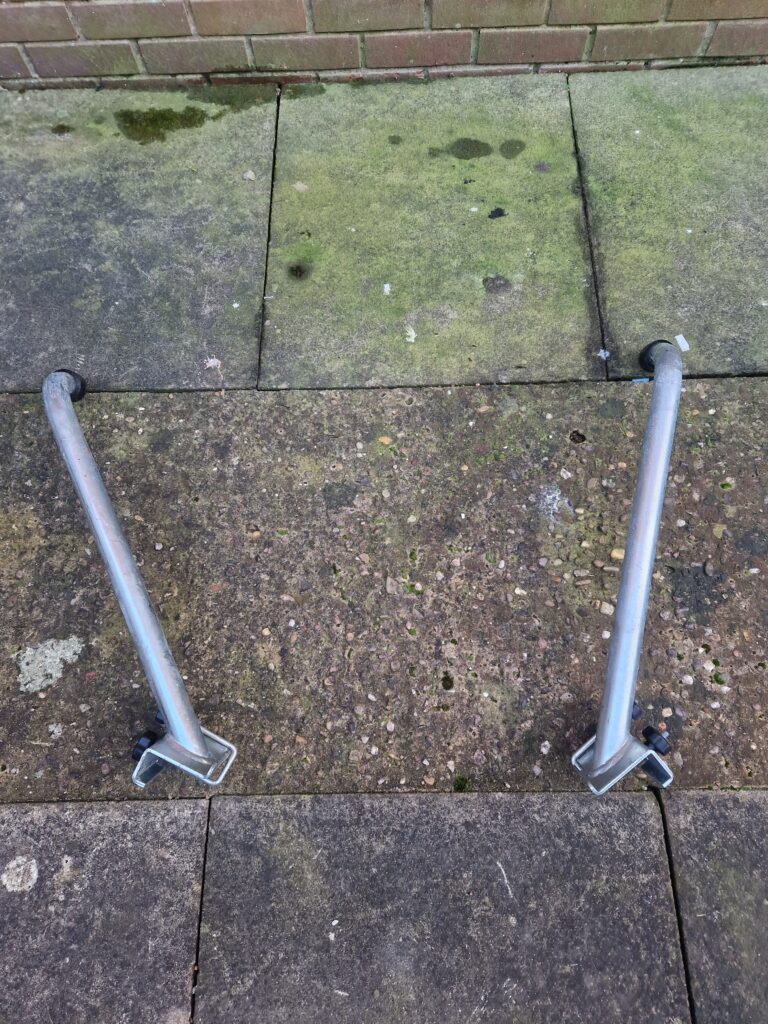
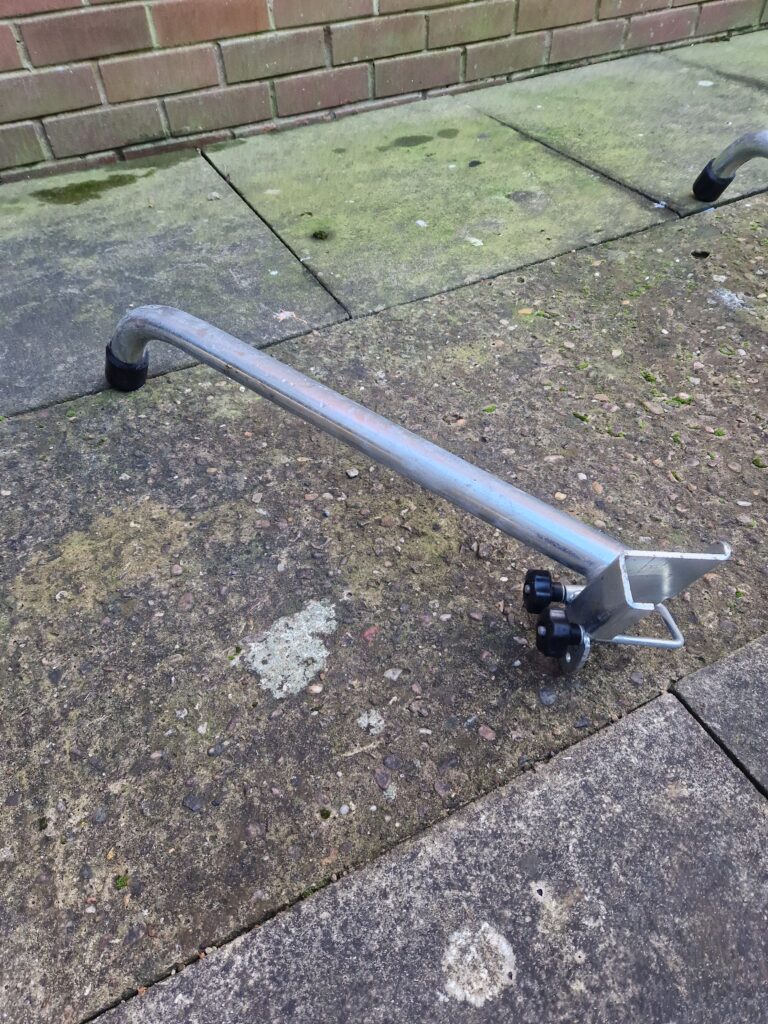
Ladder standoffs are an invaluable tool for anyone working near gutters. These attachments keep the top of the ladder away from the wall, providing additional stability and preventing the ladder from resting directly on gutters.
Standoffs also allow you to reach gutters without leaning back as much. This in itself makes it the perfect saftey accessory. In all fairness, it is difficult at times to complete any repairs or clear any gutters without one. I find that by using a standoff the ladder does feel more secure, also due to the fact that it has a bigger surface area on the point of contact with the surface that it is rested against. In my work, I actually use two different types of ladder standoffs to suit specific tasks:
Outer Wall Standoff
This is my go-to standoff for accessing gutters from the outer walls of a house. It provides excellent stability and ensures safe access without having to lean back, which is crucial when working at height.
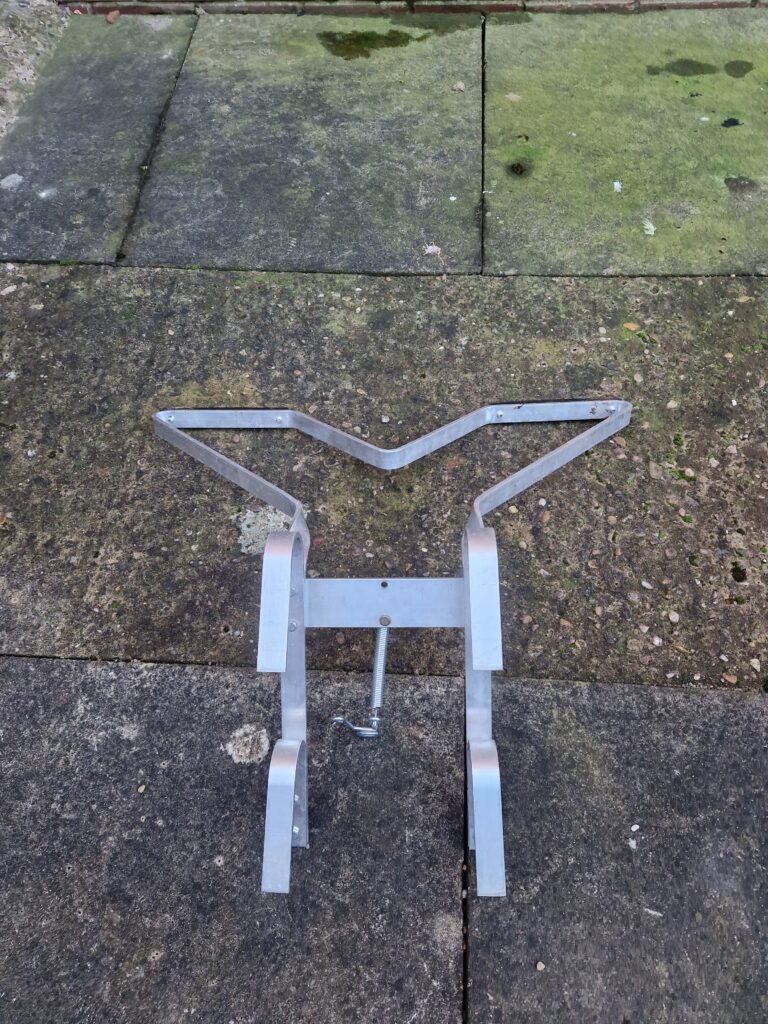
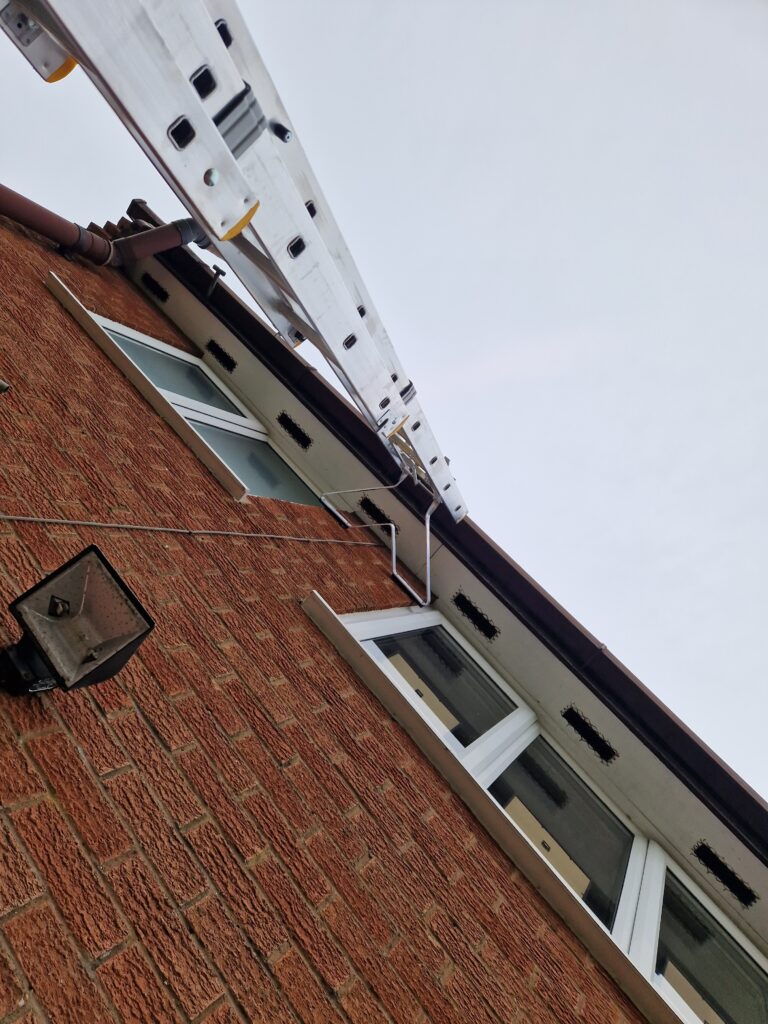
Roof Contact Standoff
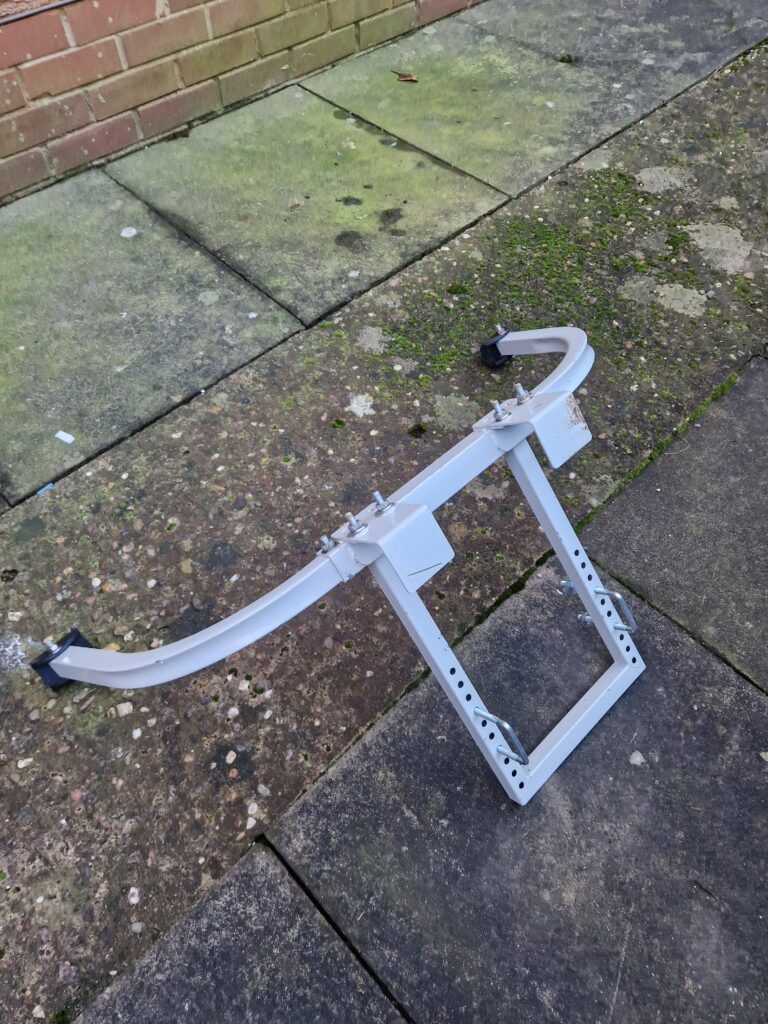
This standoff is designed for leaning the ladder against the roof itself. I initially purchased it when I needed to access the full length of a gutter to fit a gutter guard. The outer wall standoff wasn’t suitable because there were no adequate spots to lean the ladder on, especially with the house windows in the way. This specific standoff enables me to safely position the ladder above the gutter, giving me easy access along the whole length of the gutter, at the correct working height.
Each type of standoff has its advantages, and having both gives me the flexibility to work safely and efficiently, no matter the setup or challenge. I’ve listed both pieces of equipment below for you to explore and see which might work best for your needs.
Ladder Standoff: Pros and Cons
Pros:
1️. Improved Safety
Provides a safer working position by keeping the ladder at a better position to reach the gutters, eliminating the need to lean back while working on gutters.
2️. Better Surface Contact
Ensures better contact with the surface it rests on, distributing weight more evenly and increasing stability.
3️. Confidence Booster
Gives you peace of mind that the ladder is correctly positioned before you climb, reducing the risk of slips or instability.
4. Affordable
Relatively inexpensive to purchase, making it an accessible safety enhancement for most budgets.
5. Lightweight
Easy to handle and doesn’t add significant weight to the ladder setup.
6. Easy to Fit
Quick and straightforward to attach to your ladder, requiring minimal effort or additional tools.
Cons of Ladder Standoffs
1️.Balance Concerns During Setup
Standoffs can throw off the ladder’s balance while lifting or setting it up against the house. Be extra cautious with weight distribution, especially when extending or moving the ladder.
2️. Weight Differences
Although many standoffs are made from lightweight aluminium, the roof-contact standoff I use is slightly heavier than my wall standoff. This can make it a bit more awkward to move around, particularly in tight spaces or when working alone.
3️. Attachment Time
The aluminium standoff is tool-free and takes just 10 seconds to attach, making it extremely convenient. However, the roof-contact standoff requires a 14mm spanner to attach, which adds time and effort to the setup process.
4️. Additional Cost
Standoffs are an additional expense on top of the ladder itself. That said, the investment is well worth it for the added safety and versatility they provide, you really can’t put a price on safety.
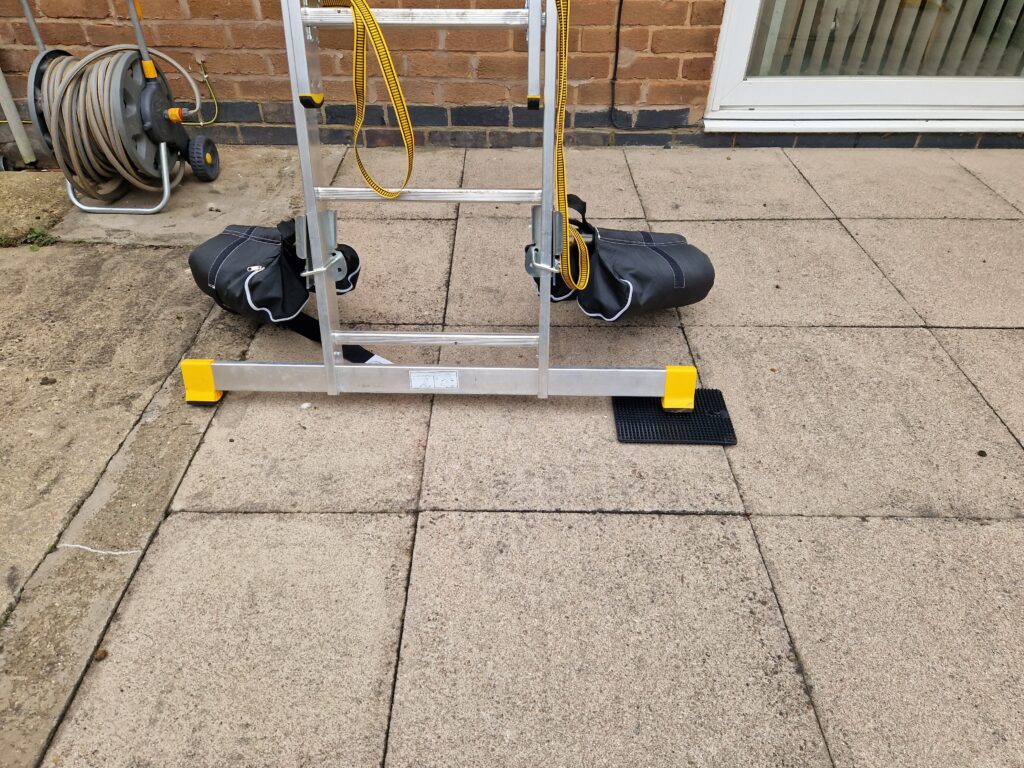
2. Ladder Stabilisers
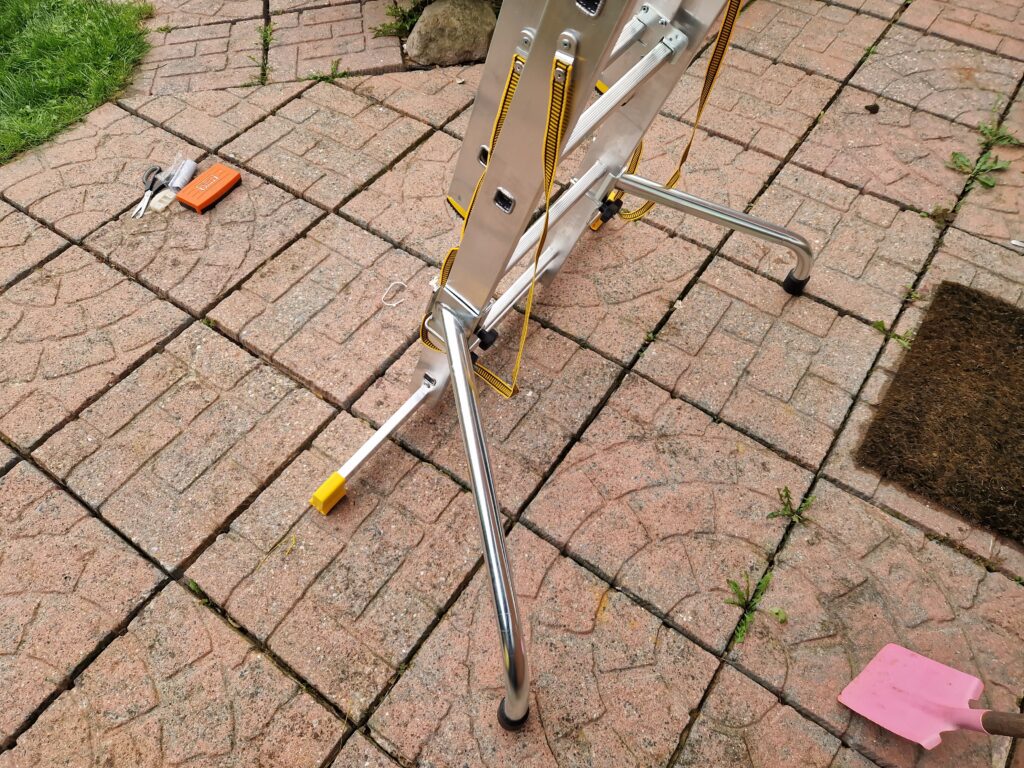
Ladder stabilisers are designed to extend the footprint of the base of your ladder, significantly reducing the risk of tipping or twisting. They are especially effective as they provide four points of contact with the ground, instead of just two.
During my research, I discovered that the primary purpose of ladder stabilisers is to counteract the twisting effects of a ladder. A common cause of falls when working on ladders is improper weight distribution, which can cause the ladder to spin on its axis, leading to a fall. While ladder stabilisers don’t completely eliminate this risk, they do make a massive difference. Additionally, they provide peace of mind while working at height, giving you more confidence and stability.
The stabilisers I use are universal and should attach to most types of extension ladders. They come as two separate detachable pieces, which are robust and well-built—ideal qualities for safety equipment. When I say they are heavy, it’s relative; they’re still manageable to carry and easy to store away.
Pros:
- Increased safety and stability
- Mitigates twisting and tipping risks
- Boosts confidence when working at height
- Universally compatible with most extension ladders
Cons:
Unfortunately, there are a few downsides:
- Time-Consuming Setup: These stabilisers take longer than I’d like to fit and adjust properly before climbing.
- Inconvenience When Moving: When repositioning the ladder, I often have to completely remove and reattach the stabilisers, which can be a bit of a hassle.
- Space Limitations: In some cases, space constraints or obstacles can make it impossible to fit the stabilisers.
When I’m unable to use the stabilisers due to these limitations, I rely on an alternative method, which I’ll explain in the next section. Despite these challenges, ladder stabilisers remain an invaluable tool for improving ladder safety and are well worth the investment.
3. Sandbags
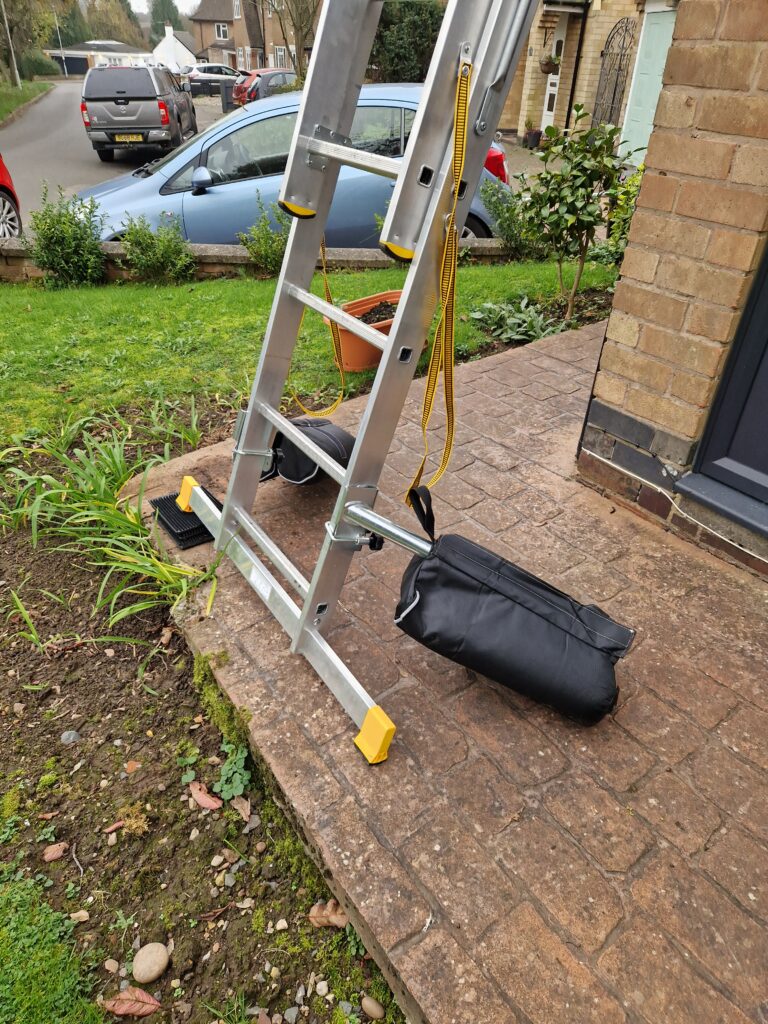
For added security, sandbags are a simple yet highly effective solution. Placing sandbags at the base of a ladder helps anchor it firmly, reducing movement and enhancing stability, even on potentially slippery surfaces.
Even if you do not have a ladder with a fixed extention bar on the bottom or ladder stabilisers, you can still use these sandbags to foot any ladder if needed by attaching them directly to the ladder leg.
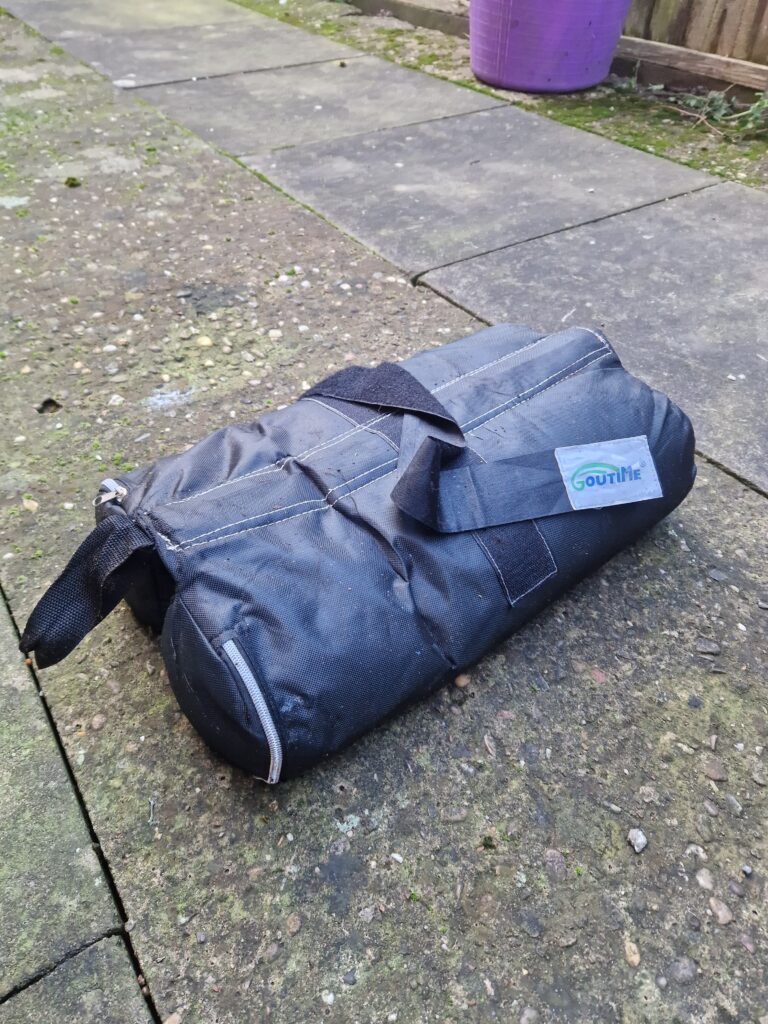
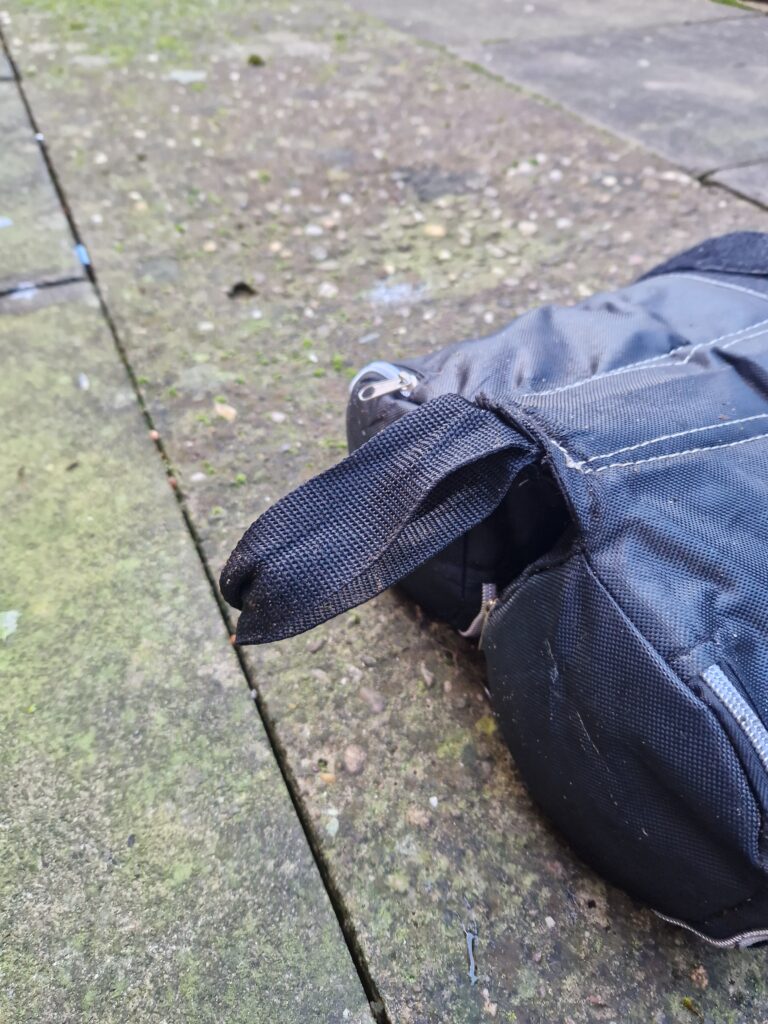
When I say “sandbags,” I don’t mean the large white sacks you might picture. Instead, these are specifically designed weighted bags, designed to hold down a Gazebo in windy weather. They’re filled with sand and come with a Velcro strap, allowing them to be easily secured to the ladder’s legs or to ladder stabilisers, as mentioned earlier.
By using these in conjunction with ladder stabilisers, you can add even more weight to the base of the ladder, significantly improving its stability and reducing twisting. Each bag weighs about 18kg but is equipped with proper carry handles, making it manageable to load and unload from a van.
Advantages:
- Improved Stability: Adds substantial weight at the base, reducing ladder twist and movement.
- Versatile Placement: Can be strapped to ladder legs or stabilisers for added flexibility.
- Enhanced Security: Helps prevent the ladder from slipping outward on less-than-ideal surfaces.
- Reliable Support: Combined with stabilisers, this setup mimics having someone physically footing the ladder—but arguably more consistently and securely.
Drawbacks:
- Additional Weight: At 18kg each, the sandbags add to the overall weight you need to manage, which can be tiring over a long job, not to mention the extra weight in the back of your van.
- Increased Setup Time: Moving the sandbags each time you reposition the ladder adds time and effort to the process.
Despite these inconveniences, I don’t think they should be overlooked. They ground the ladder effectively, provide exceptional stability, and significantly reduce risks like slipping or twisting. With sandbags and stabilisers in place, you’ve got one of the most secure unfixed ladder setups possible—comparable to not having anything at all.
Looking at the setup, I hope it’s clear how these accessories work together to create a safer working environment, giving you confidence and peace of mind while at height.
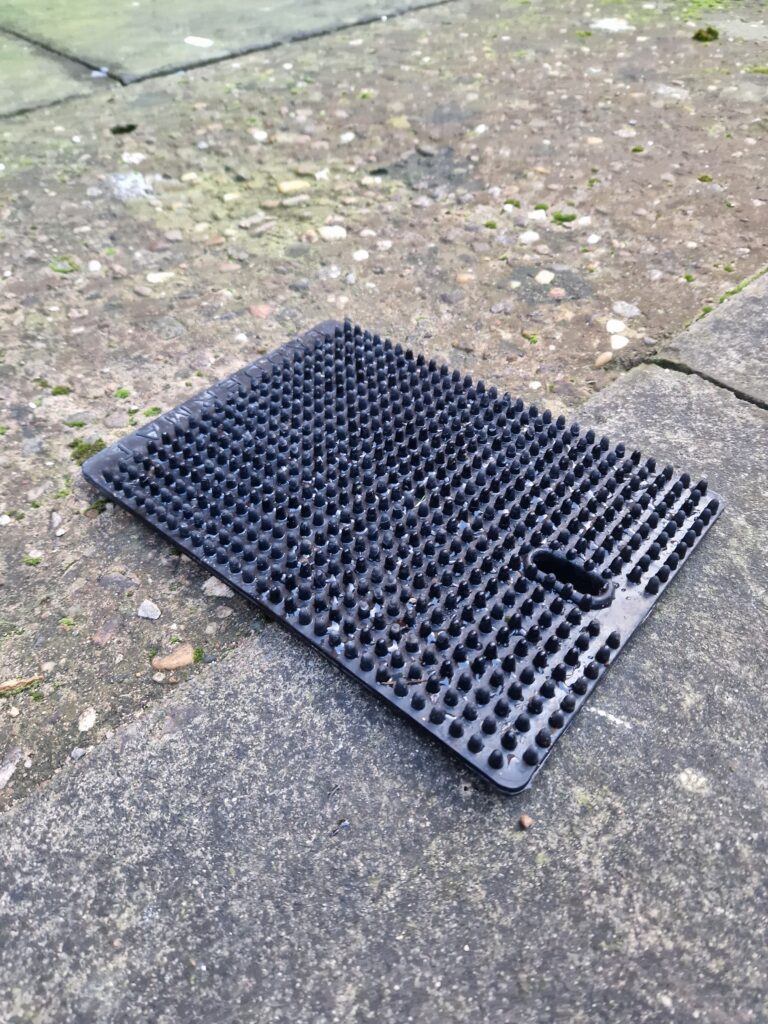
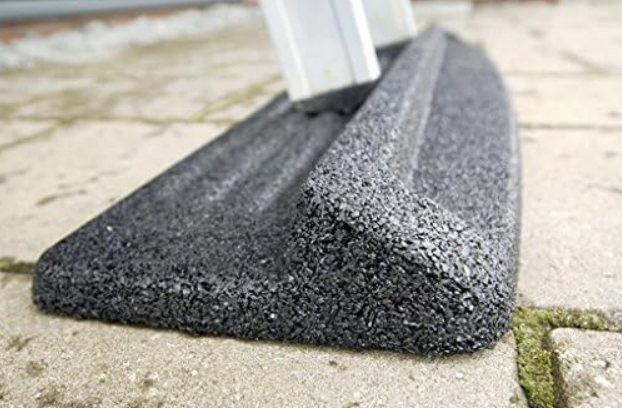
4. Ladder Levellers and Low-Slip Mats: A Simple Yet Effective Safety Solution
Another essential safety accessory I’ve invested in is ladder levellers with low-slip mats. These are relatively inexpensive as well, they are easy to store, and straightforward to use, making them a no-brainer for anyone working with ladders.
I bought these specifically for use on uneven or slippery surfaces, as setting up a ladder often involves working on less than ideal ground. Whether it’s a sloped driveway, or even a muddy area, these levellers help to straighten and stabilise the ladder. By ensuring the ladder is level, they significantly reduce the risk of twisting or wobbling when climbing or working at height.
Pros:
- Leveling Uneven Surfaces: They help balance the ladder on uneven ground, providing a stable and secure base.
- Preventing Slips: The low-slip mats are particularly useful on potentially slippery surfaces like wet stone or tiles.
- Protecting Lawns: They prevent the ladder legs from digging into soft ground, such as grass, avoiding any damage to a customer’s lawn.
- Affordable and Compact: They’re not costly and are small enough to store easily in any van or tool kit.
- Ease of Use: These levellers are quick to set up, require no tools, and take almost no time to attach.
No Real Downsides:
In my opinion, there are no real drawbacks to having these in your setup. They add another layer of safety and functionality without complicating your workflow. When paired with other accessories, such as stabilisers and sandbags, they contribute significantly to the overall stability of any ladder.
If you frequently find yourself working on uneven or soft surfaces, I’d say ladder levellers with low-slip mats are a must-have addition to your safety equipment. They’re an inexpensive way to increase safety, protect surfaces, and give you the confidence to work effectively.
5. Big Foot Ladder Stopper Mat
The Big Foot Stopper Mat is very similar to the ladder mats we previously looked at. Yet another great ladder safety accessory, but it’s best suited for ladders without a fitted extension stabiliser, as shown in the picture. Unfortunately, the footer on mine seems to be around 10mm too short for my ladder, which has a 1m stabiliser attached at the base.
That said, if you have a ladder that is compatible with one of these mats, I would definitely recommend getting one. Here’s why:
Key Benefits
1️. Increased Grip:
The mat provides excellent grip and increases the surface area for the ladder’s contact points, making it less likely to slip.
2️. Prevents Backward Movement:
The mat features grooves for the ladder feet to sit securely in and has a raised back edge that stops the ladder from slipping backward during use.
3️. Improves Stability:
By stabilising the ladder on smooth or slippery surfaces, it ensures a safer setup overall.
4️. Compact and Affordable:
The mat isn’t expensive, and it’s easy to store, carry, and use, making it a practical addition to your ladder safety gear.
Final Thoughts
While it didn’t work perfectly with my ladder, the downsides to having one of these is next to none. This mat can be a fantastic option for those with compatible ladders. It’s an affordable, easy-to-use solution that can significantly enhance safety, especially on surfaces prone to slipping. If your ladder fits, the Big Foot Stopper Mat is well worth the investment!
Best Practices for Ladder Safety
Ladder Safety: Essential Practices to Follow
While safety accessories are a must in my opinion, I always make a point of checking my ladders before each use. This is something I have to keep reminding myself to do. It’s a habit worth picking up, especially since my ladders are stored on the roof of my van, constantly exposed to the elements. Regular checks ensure they remain safe and reliable for every job.
Here are some essential ladder safety practices to follow:
1️. Inspect for Damage
Before using your ladder, check for any visible damage, such as cracks, bent rungs, or worn-out feet. Even small issues can compromise the ladder in any way.
2️. Ensure Cleanliness
Make sure the ladder is free from dirt, grease, or debris that could cause slipping, especially on the rungs or feet.
3️. Check Moving Parts
Inspect hinges, locks, and other moving parts to ensure they are functioning correctly and not worn out.
4️. Stability Check
Confirm that stabilisers, levellers, or other accessories are securely attached and in good condition.
5️. Weight Limit Compliance
Always adhere to the ladder’s weight limit, including your weight and any tools or materials you’ll be carrying.
6. Proper Footwear
Wearing sturdy, non-slip shoes with good grip is a good idea when working with ladders. Personally, I always wear my boots because the heel locks onto the rungs, providing a firm foot placement and significantly reducing the risk of slipping.
Avoid using completely flat footwear like trainers, as they don’t offer the same level of stability or grip on the rungs. Proper footwear is a lot more comfy when up the ladders for an extended period of time.
7. Secure Setup
Always ensure your ladder is placed on a stable, level surface and positioned as close to a 75-degree angle as possible before climbing. Many ladders come with markings or arrows on the side to indicate whether you’ve set them up at the correct angle—these can be a helpful guide.
Pro Tips for Safe Gutter Cleaning
Beyond ladder safety, here are a few additional tips to make not just gutter cleaning safer but any use of ladders more safe:
Work with a Partner (When Possible): A Safer Option for Working at Height
Whenever possible, it’s always safer to work with someone when using a ladder. Having a partner hold the base of the ladder adds an extra layer of stability and reassurance.
That said, I understand that many of us, myself included, often work alone. In these cases, it’s even more important to implement the safety precautions we’ve discussed, such as using stabilisers, sandbags, or low-slip mats to secure the ladder.
Working solo doesn’t mean you have to compromise on safety—taking these extra steps ensures you can carry out tasks as securely as possible.
Use a Bucket or Toolbelt: Keep Your Hands Free for Safety
Carrying tools or debris in your hands while climbing a ladder can be risky. Instead, use a toolbelt or attach a bucket to the ladder to keep your hands free and maintain better balance.
When I’m doing gutter repairs, I often use a piece of rope tied to one of the rungs near the height I’ll be working from. Before climbing, I securely attach a bucket containing all the tools or materials I’ll need. Once I’ve reached the top and I’m in a secure position, I pull the bucket up in front of me, ensuring I’m facing forward with both feet firmly on the ladder.
This method eliminates the need to carry items while climbing, which, in my opinion, is much safer. It’s a simple yet effective way to reduce risk and make working at height more manageable.
Watch the Weather: Safety First
I’d love to say, “watch the weather,” but operating in the UK makes that a bit challenging! That said, I always avoid using ladders in icy or windy conditions whenever possible. These conditions significantly increase the risk of slipping or instability, making it unsafe to work at height.
While we can’t control the weather, taking extra precautions and avoiding extreme conditions is key to staying safe on the job.
Kit To Avoid Working At Height
Gutter Vacuum
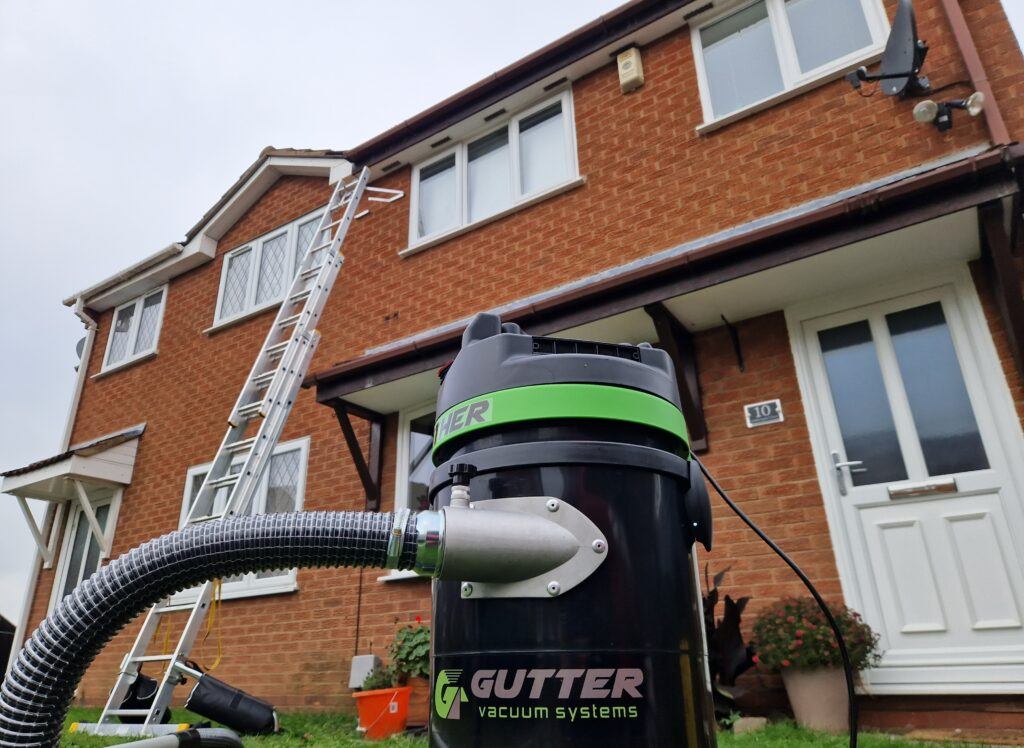
I personally use a gutter vac for most of my gutter-clearing jobs. These systems allow you to keep your boots firmly on the ground, which, is always a better option and completely eliminates the risks associated with working at height.
Some may argue that gutter vacs don’t always remove 100% of blockages, particularly in tricky areas like bends and downpipes. While this is true, the need to use a ladder is greatly reduced. By limiting ladder use to repairs or occasional hard-to-reach spots, the time spent working at height is at least significantly minimised.
For me, using a gutter vac is essential, I wouldn’t want to rely on ladders for every single gutter clearing job. It’s a safer, more efficient approach that makes clearing gutters much easier and less hazardous.
For more information about the benefits of gutter vacs, please visit our dedicated page on this topic.
Gutter Cleaning Showdown: Gutter Vacuums vs. Ladder and Bucket – Which Is Better?
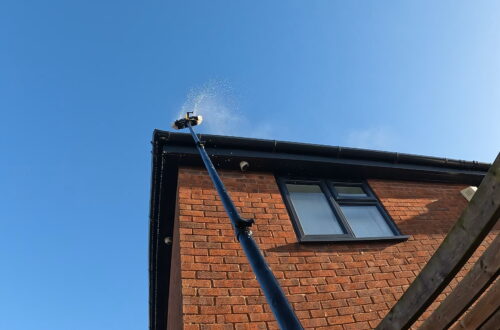
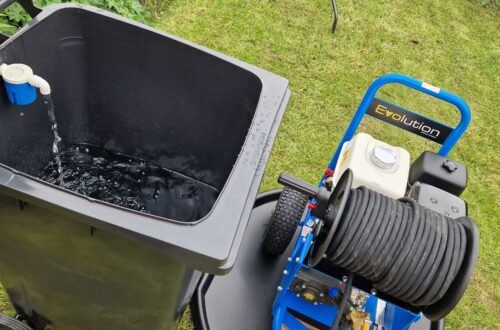
Water Fed Pole Systems
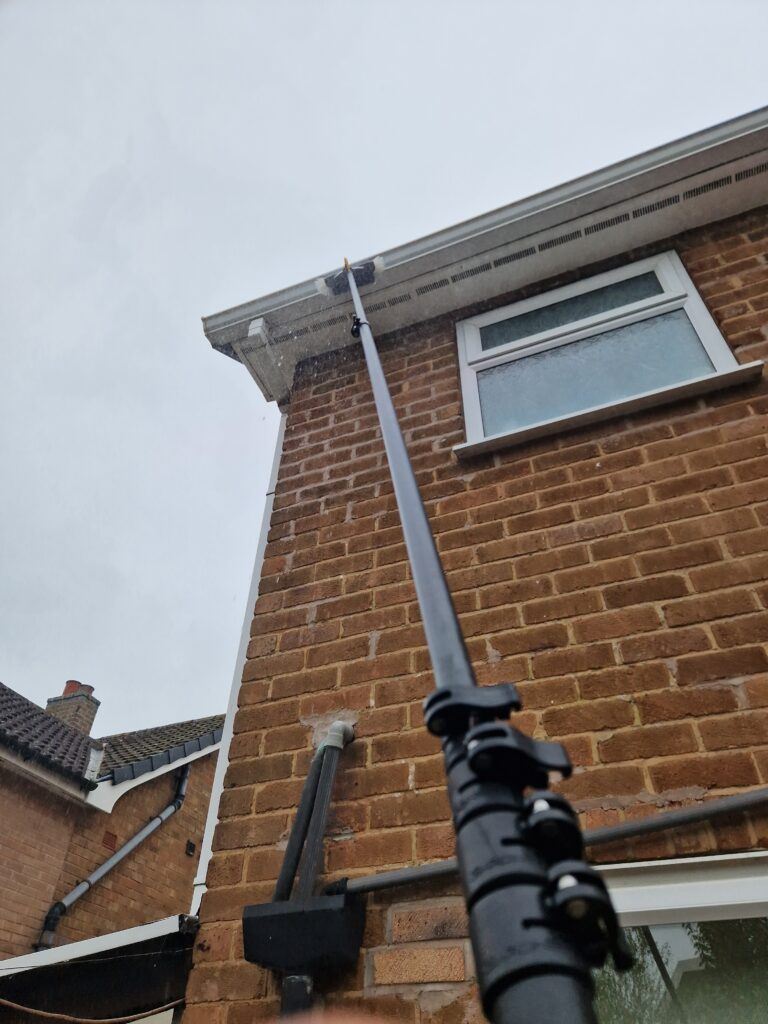
For cleaning the external surfaces of gutters, soffits, and fascias, a water fed pole system is an excellent choice. I offer gutter clearing, gutter, soffit & fascia cleaning, and gutter repairs as separate services, and this tool has proven invaluable for achieving spotless results.
Using a water fed pole system allows you to safely keep your boots on the ground while reaching those hard-to-access areas. This not only improves safety but also increases efficiency, especially when dealing with grime and dirt buildup on higher surfaces.
An added bonus of a water fed pole system is its versatility. These systems are commonly used for window cleaning, meaning you could easily expand your business by offering additional services. It’s a practical investment that delivers great results while also opening up new opportunities to grow your service offerings.
For more information about the benefits of water fed pole systems, please visit our dedicated page on this topic.
Using a WFP System For Gutter, Soffit and Fascia Cleaning.
When to Call a Professional
While DIY gutter cleaning can be rewarding and, at times, the most cost-efficient choice, there are situations where it’s best to leave it to the professionals. With the vast range of specialised equipment available for gutter maintenance today, hiring a professional is often safer and more practical, especially when you factor in the time, effort, and potential risks involved.
If your gutters are particularly high, your roof has tricky angles, or you’re unsure about ladder safety, bringing in a professional ensures that all these risks are mitigated.
With a service like ours, you can trust that ladder safety and property protection are my top priorities. From standoffs and stabilisers to sandbags and low-slip mats, I use top-quality equipment to safeguard both your home and myself while delivering excellent results.
Professional gutter cleaning isn’t just about getting the job done—it’s about doing it right, safely, and with peace of mind for everyone involved.
Conclusion: Stay Safe and Protect What Matters Most
Gutter cleaning is a necessary task to protect your home from water damage, but safety should always come first. By investing in the right tools, such as ladder standoffs, stabilisers, and sandbags, and any other accessories you deem fit, you can significantly reduce the risks of working at height.
For those unsure or working in challenging conditions, don’t hesitate to call in a professional. The peace of mind that comes with knowing the job is done safely and effectively is worth it. Whether you’re tackling it yourself or hiring an expert, gutter cleaning can be done without compromising on safety—because nothing is more important than your wellbeing.
By following these tips and tools, you can clean your gutters with confidence, knowing you’ve taken every measure to stay safe while protecting your home.
Exterior Cleaning, England, South Yorkshire UK


You May Also Like
How to Clean Gutters, Soffits, and Fascias: A Beginner’s Guide to Water Fed Pole Systems
What Do I Need To Start A Pressure Washing Business
